Introduction
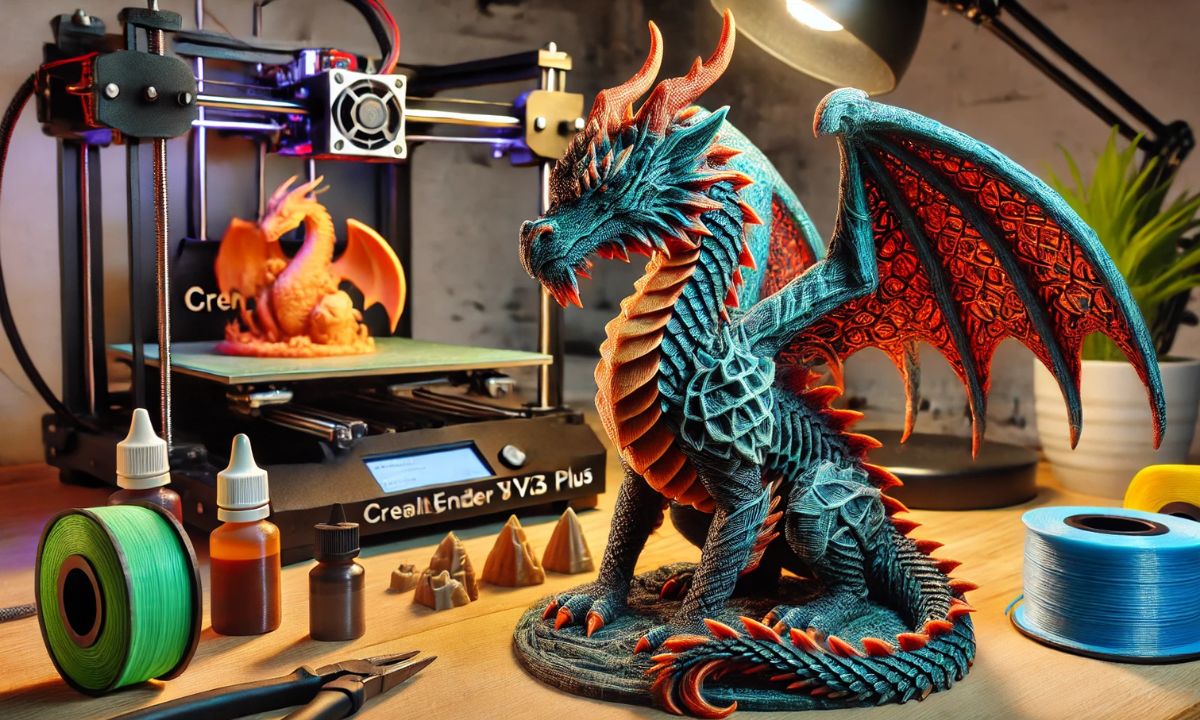
There’s something undeniably magical about dragons. Whether fearsome beasts guarding treasures or elegant creatures soaring through the skies, they capture the imagination like no other mythical being. And with the power of 3D printing, you can bring your dragon to life from your desktop.
Creating a 3D printed dragon is a multi-step process that involves careful planning, selecting the right materials, fine-tuning print settings, and applying post-processing techniques for a professional finish. From the initial digital design to the final painted model, every choice you make impacts the quality and durability of your dragon.
This guide will walk you through the essential steps, starting with the most crucial foundation: designing your dragon model.
Designing Your Dragon Model
Before you can print your dragon, you need a solid digital model. Whether you prefer a simple static figurine or a fully articulated design with moving joints, the software and techniques you choose will determine your creation’s final look and functionality.
Choosing the Right Software
The right design software depends on your experience level and the complexity of your dragon:
- Blender – A powerful, free 3D modeling tool professionals and hobbyists use. It offers advanced sculpting features, perfect for highly detailed dragons with intricate scales, wings, and horns. However, it has a steep learning curve, which may be intimidating for beginners.
- Tinkercad – A beginner-friendly, browser-based design tool. It’s ideal for creating simpler, low-poly dragon models but lacks Blender’s advanced sculpting and customization features. If you’re new to 3D design, Tinkercad is a great starting point.
Pros & Cons of Each Tool
| Software | Pros | Cons |
|---|
| Blender | High level of detail, advanced sculpting tools, free | Steep learning curve, requires a powerful computer |
| Tinkercad | Easy to use, great for beginners, works in a browser | Limited design flexibility, not ideal for complex models |
Determining Model Complexity
Your dragon’s design can be as simple or intricate as you want. However, complexity impacts print time, material usage, and ease of post-processing.
- Static Dragons – These are fixed-position models, ideal for decorative pieces. They are easier to design and print since they don’t require joints or movable parts.
- Articulated Dragons – These models have interlocking or ball-jointed segments, allowing movement in areas like the tail, wings, or limbs. While more dynamic, they require additional design considerations, such as proper joint spacing, to avoid print failures.
Considerations for Articulated Dragons
- Ensure joints have enough clearance to move freely after printing.
- Use flexible filaments for added durability.
- Test-print small sections to refine the articulation before committing to a full model.
Using Reference Images
Designing a dragon from scratch can be daunting, but reference images help bring your vision to life. Using real-world inspiration, such as lizards, bats, and birds, can add realism to your model.
Where to Find Quality Reference Images:
- Art websites like ArtStation or DeviantArt are great for concept art and detailed inspiration.
- Google Images & Pinterest – Ideal for collecting different styles and anatomical references.
- 3D Model Libraries like Thingiverse – Browse existing dragon models for design ideas and learn from other creators.
By carefully choosing your software, defining the complexity of your model, and gathering strong reference images, you set the stage for a successful 3D print. Next, we’ll select the best materials and equipment for the job. Stay tuned!
Choosing the Right Materials and Equipment
The right materials and equipment can make or break your 3D printed dragon. From choosing a suitable filament to selecting a reliable printer, every decision impacts the final quality of your model. Let’s break down what you need for a successful print.
Selecting the Best Filament
Your choice of filament affects durability, detail, and ease of post-processing when printing a dragon. The two most popular filaments for 3D printing dragons are PLA and PETG, each with its own strengths.
PLA (Polylactic Acid)
- Easy to print with, making it ideal for beginners.
- Produces fine details, perfect for intricate dragon designs.
- More rigid, which is great for display models.
- Brittle compared to PETG—less suitable for articulated dragons or models with thin parts.
PETG (Polyethylene Terephthalate Glycol-Modified)
- More flexible and impact-resistant, ideal for articulated dragons.
- Better heat and moisture resistance than PLA.
- Offers decent detail while being more durable.
- Harder to print with than PLA (requires higher temperatures and fine-tuned settings).
Best Choice? PLA is the way to get crisp details if you’re making a static dragon. If you’re creating an articulated dragon, PETG is a better option due to its flexibility and durability.
Picking a Suitable 3D Printer
A reliable printer ensures that your dragon turns out as intended. One standout option is the Creality Ender 3 V3 Plus, known for its balance of affordability and performance.
Creality Ender 3 V3 Plus – The Go-To Choice
- Excellent print quality at an affordable price.
- Easy to assemble and modify, making it a great choice for beginners and experienced users.
- Supports a wide range of filaments, including PLA and PETG.
Other Recommended Printers
- Prusa i3 MK3S+ – Known for high precision and reliability, but pricier than the Ender 3.
- Anycubic Vyper – Auto-bed leveling for easy setup, great for beginners.
- Bambu Lab X1 Carbon – A premium option with ultra-fast printing and multi-color capabilities.
If you’re starting, the Creality Ender 3 V3 Plus is a fantastic entry point. At the same time, more advanced users may prefer a Prusa i3 MK3S+ for high-detail prints.
Essential Tools for a Smooth Process
To ensure a hassle-free printing experience, having the right tools on hand is crucial.
Nozzle Selection for Fine Details
- Standard 0.4mm nozzle – Balances speed and detail.
- 0.2mm nozzle – Ideal for ultra-detailed dragons but increases print time.
- 0.6mm or 0.8mm nozzle – Great for larger, less detailed models.
Cutting Tools for Support Removal
- Precision cutters or flush cutters to remove supports cleanly.
- Hobby knives or X-Acto blades for fine adjustments.
Leveling Kits for Proper Calibration
- A well-leveled bed ensures smooth, consistent prints.
- Use an auto-bed leveling system (if supported) or manual adjustment tools.
3. Preparing Your Model for Printing
Once your dragon model is designed and you have the right materials and equipment, it’s time to prepare your file for printing. This step ensures that your dragon prints correctly and with the desired level of detail.
File Formats and Compatibility
Before sending your model to the printer, it needs to be in a compatible format. The most commonly used formats for 3D printing are STL and OBJ.
- STL (Stereolithography) is the most widely used format. It stores the 3D shape as a mesh of triangles and is ideal for most 3D printers.
- OBJ (Object File) – Supports color and texture data, useful if you’re printing a multi-color dragon with certain 3D printers.
To convert and save your designs:
- Blender/Tinkercad → Export as STL or OBJ.
- Check for errors using MeshLab or Netfabb to repair any issues before printing.
Using Slicing Software
A slicing program converts your 3D model into a set of instructions (G-code) for your printer. Two of the most popular slicing software options are Simplify3D and PrusaSlicer.
Simplify3D
- Advanced customization options for fine-tuning print settings.
- Better support structure generation, leading to cleaner prints.
- Paid software, making it less accessible for beginners.
PrusaSlicer
- Free and open-source, with a great user interface.
- Works well with Prusa and other popular printers.
- Automatic support generation with customizable settings.
Both software options allow you to adjust key slicing parameters for the best results.
Setting Slicing Parameters
Properly configuring your slicing software ensures a balance between print quality, strength, and speed.
Layer Height (Detail vs. Print Time)
- 0.1mm → High detail, but slow print. Best for intricate dragon scales and features.
- 0.2mm → Good detail with reasonable print time. Recommended for most dragon prints.
- 0.3mm+ → Faster prints with less detail. Suitable for large models without fine details.
Infill Density (Strength vs. Material Use)
- 10-20% → Light and efficient for decorative models.
- 30-50% → Stronger, but uses more filament.
- 100% → Solid print, but rarely necessary.
Supports (Essential for Overhangs & Joints)
- Auto-generated supports – Great for beginners, but may require tweaking.
- Custom supports – Allows more control and is useful for articulated dragons with complex joints.
With your model prepared, sliced, and optimized, you’re ready for the next step—printing and post-processing. Stay tuned for the next section, where we’ll cover the printing process and how to refine your dragon for a professional finish!
Optimizing Printing Parameters
Even the best 3D model can fail if the printing parameters aren’t optimized. Fine-tuning settings like layer height, infill density, and print speed ensure that your dragon prints have the perfect balance of detail, strength, and efficiency.
Adjusting Layer Height for Detail
Layer height determines the level of detail in your print and directly impacts print time.
- 0.1mm (High Detail) → Best for intricate dragon features like scales, wings, and facial details. However, it significantly increases print time.
- 0.2mm (Balanced Detail & Speed) → Provides good quality while keeping print time reasonable. Recommended for most dragon prints.
- 0.3mm+ (Faster Prints, Less Detail) → Works for large models with less critical fine details.
Pro Tip: If printing an articulated dragon, use 0.15mm–0.2mm to ensure smooth joint movement without excessive print time.
Setting Infill Density
Infill density affects your print’s strength, weight, and material usage.
| Infill % | Best For | Pros | Cons |
|---|
| 10-20% | Decorative models | Uses less filament, prints faster | Less durable |
| 30-50% | Articulated or mid-sized models | Stronger while maintaining efficiency | Slightly more filament usage |
| 100% | High-stress areas or solid dragons | Maximum durability | Uses the most filament, very slow print |
For most static display dragons, 15-20% is enough. If printing an articulated dragon, opt for 30-40% to keep the joints strong without excessive weight.
Controlling Print Speed
Print speed directly impacts the level of detail and the risk of print failures.
- Slow speeds (40-60 mm/s) → Best for detailed dragons with fine textures.
- Medium speeds (60-80 mm/s) → Balances speed and quality for general prints.
- Fast speeds (80+ mm/s) → Only suitable for large, simple models without intricate details.
Best Approach:
- Use 40-50 mm/s for small details (scales, facial features, claws).
- 60 mm/s for body parts (wings, legs, tail).
- 80 mm/s+ only if printing a large, blocky dragon.
5. Printing and Post-Processing
Now that your model is sliced and optimized, it’s time for the actual printing process and refining your dragon to perfection.
Starting the Print
Before starting, double-check these points:
- Bed leveling – A properly leveled bed prevents adhesion issues.
- Filament feeding – Ensure your filament is clean and dry to avoid extrusion problems.
- Print preview – Use your slicer’s preview mode to verify the layers and support structures.
Once the print begins, carefully monitor the first few layers—this is where most failures happen. The rest of the print will likely succeed if the first layers adhere properly.
Removing Supports Safely
Support is necessary if your dragon has overhangs, wings, or intricate joints. However, removing them incorrectly can break fragile details.
Best Support Removal Techniques:
- Use flush cutters → Snip away large support sections first.
- Hobby knife/X-Acto blade → Carefully remove supports in tight areas.
- Tweezers for fine details → Prevents breaking delicate areas like claws or horns.
- Soften supports with warm water (for PLA) → Makes them easier to remove without damaging the model.
Pro Tip: When printing articulated dragons, test the joints carefully after removing supports to avoid snapping them.
Sanding and Painting for a Polished Finish
Your dragon will look even better with post-processing.
Smoothing & Sanding:
- Use 220-400 grit sandpaper for rough spots.
- Higher grit (600-1000) for a polished finish.
- For PLA: Use wet sanding to reduce heat buildup.
- For PETG: Sand gently—it’s more prone to stringing.
Painting for a Professional Look:
- Use acrylic paints – They adhere well to PLA/PETG.
- Prime before painting – A base coat improves color vibrancy.
- Layering & shading – Adds depth to scales and wings.
- Seal with clear coat – Protects paint and adds a glossy/matte finish.
For a metallic or dragon-skin effect, use dry brushing or airbrushing for the best results.
Resources & Further Learning
Want to master 3D printing dragons? Check out these expert resources:
- Kingroon’s Guide to 3D Printed Articulated Dragons → Advanced techniques for creating flexible, movable dragons.
- Creality’s Blog on 3D Printed Dragons → In-depth printer settings and material choices.
- Instructables Guide to 3D Printing Basics → Great for beginners learning the fundamentals.
- YouTube Tutorials (Blender & Tinkercad) → Hands-on videos for designing and printing dragons from scratch.
With these final refinements, your 3D printed dragon will look as epic as you imagined. Now go forth and bring your mythical beast to life!
Conclusion
Creating a 3D printed dragon is an exciting journey that blends creativity, engineering, and craftsmanship. From designing a model with Blender or Tinkercad to fine-tuning print settings and mastering post-processing techniques, every step contributes to the final masterpiece.
Quick Recap of the Process:
- Designing – Choose the right software, define model complexity, and use reference images for accuracy.
- Selecting Materials & Equipment—Choose the best filament (PLA for detail, PETG for durability) and a reliable printer like the Creality Ender 3 V3 Plus.
- Preparing the Model: Convert files to STL/OBJ and slice with the right parameters (layer height, infill, print speed).
- Printing & Post-Processing – Monitor the print, carefully remove supports, sand rough edges, and paint for a stunning finish.
Keep Experimenting & Improving
3D printing is part science, part art. Every print is a learning experience. Don’t be afraid to tweak settings, test new materials, and refine your techniques. Whether you’re crafting a majestic display dragon or an articulated beast, each print brings you closer to mastering the craft.
Now, it’s time to bring your mythical creation to life. Happy printing!
ALSO READ: Best iPhone 15 Pro Max Case: Top Picks for Protection & Style
FAQs About 3D printed dragon:
1. What is the best filament for printing a dragon?
PLA is great for detailed models, while PETG offers durability and flexibility for articulated dragons.
2. How long does it take to print a dragon?
Print time varies based on size and detail—a small dragon may take 6-8 hours, while a large, detailed one can take 24+ hours.
3. Do I need supports for my 3D printed dragon?
Yes, especially for wings, horns, and overhangs. Use well-placed supports to avoid print failures.
4. What’s the best way to paint a 3D printed dragon?
Prime the surface, use acrylic paints, and apply light layers for the best finish. A clear coat adds durability.
5. How do I make an articulated 3D printed dragon move smoothly?
Ensure proper joint clearance, print with flexible filaments like PETG, and remove supports carefully.